
Vintage Car Restoration Guide DIY: Learn how to restore your classic car with expert tips and a 12-step success plan. 🛠️
Vintage Car Restoration Guide DIY: Master Your Dream Ride in 12 Steps
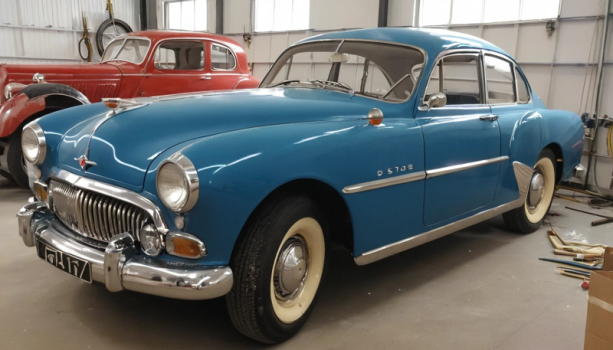
Ever Dreamed of Bringing a Classic Car Back to Life? 🚗
Imagine driving a ’67 Mustang or a Chevy Bel Air. The engine sounds great, and the chrome shines. You feel like you’ve traveled back in time.
Classic cars are more than just cars. They are symbols of the past, full of character and charm.
Now, imagine that dream car in your garage. You could restore it yourself.
This DIY guide will help you do just that. Restoring a vintage car is a big job. But with patience and the right tools, you can make it happen.
🔧 What Is Vintage Car Restoration?
Vintage car restoration is a mix of art and science. It’s not just about painting the car. It’s about making it look, feel, and run like new.
This means fixing the engine, replacing panels, and restoring the interior. It’s a detailed process.
There are different ways to restore a car. You can aim for a perfect showroom look, a car you can drive every day, or a modernized version. Your choice depends on what you want and how much you can spend.
🧰 Essential Tools for DIY Restoration
Before you start, you need the right tools. Restoring a car is not a simple task.
You’ll need wrenches, ratchets, and screwdrivers in different sizes. Pliers, allen keys, a hammer, and wire cutters are also important. But there’s more.
As you work, you’ll need special tools. A torque wrench is key for tightening bolts right. An engine hoist helps with heavy engines. For body work, you’ll need grinders, sandblasters, and welding gear.
Remember, safety is important. Wear gloves, goggles, and ear protection. Have a fire extinguisher ready. And get a workshop manual for your car. It will be your guide.
📝 Step 1: Planning Your Restoration Project
Starting without a plan is like sailing without a map. First, decide what you want from your project. Do you want a car for fun, a show car, or a modernized version?
Then, check the car’s condition. Does it run? Is the frame okay? Is the engine original? Knowing this will help you plan your time and budget.
Restoration costs can vary a lot. It can be $5,000 or more, depending on the car. Set a budget and be ready to spend a bit more.
Also, plan your time wisely. If you work only on weekends, it could take 1–2 years. Take your time. Every part you touch is a piece of history.
🧼 Step 2: Disassembling the Vehicle
Now the real fun begins. It’s like digging through history. Remove and document every part of the vehicle. Use labeled bags and bins for storing parts.
Take lots of photos from all angles. This helps when putting things back together.
Label wiring and hoses with tape and a marker. Don’t throw away anything unless it’s broken beyond repair. Even broken parts can help with replacements or rebuilding.
This stage is slow, careful, and often messy. But it makes the restoration easier.
🧽 Step 3: Cleaning and Inspecting Parts
Clean every part you remove well. Use degreaser and wire brushes to remove grease and corrosion. A parts washer can help clean oily parts.
Look for damage like cracks, wear, or rust. Use a flashlight and magnifier if needed. Mark anything that needs fixing or replacing.
Decide if you’ll send parts for special work. This could include head machining, transmission rebuilding, or re-chroming trim.
🔍 Step 4: Repairing and Replacing Components
After cleaning and checking, start fixing things. Replace bushings, bearings, seals, and gaskets. If the engine is good, rebuild it with new parts.
If not, consider a new engine. Update suspension, brakes, and drivetrain for safety. Modern brake kits are a good choice.
Some parts might be hard to find. Classic car forums and clubs can help. You might find the exact part you need.
🎨 Step 5: Bodywork and Paint
Bodywork is hard but rewarding. Start by removing old paint and rust. Use sandblasting or chemical strippers.
Fix holes and replace bad panels. A good welder is key here.
Once the metal is fixed, prepare it for paint. This means primer, sanding, more primer, and patience. Paint in a clean, well-ventilated area. Choose the original color or something that shows your style.
The paint job is like the car’s new skin. Get it right, and people will stare.
🪑 Step 6: Restoring the Interior
Give the inside a makeover. Remove old seats, carpets, and headliners. Check the floor for rust or damage.
Fix or replace bad areas. Choose materials that match the original or go for a custom look. You can buy interior kits that include everything.
Details like polished knobs and vintage radios can make your car special.
🔌 Step 7: Electrical System Overhaul
Old wiring is often bad. Many choose to replace it with a new one. This makes the car safe and modern.
Check all connections and make sure everything is right. LED lights are popular for better visibility. But some like the old bulbs for a classic look.
Test all electrical systems. Make sure everything works right.
🛠️ Step 8: Reassembling the Car
Now it’s time to put the car back together. Use your photos and notes to guide you. Start with big parts like the engine and transmission.
Then, move on to the inside and the trim. Be very careful. Double-check everything.
🧪 Step 9: Testing and Fine-Tuning
Before you drive it, check everything. Start the engine and listen for strange sounds. Look for leaks.
Test the brakes and steering in a safe place. You might need to fix some things more than once.
📸 Step 10: Documenting the Restoration
Be proud of your work. Documenting your restoration adds value and shows your care. It’s good for selling the car later.
Make a photo book, blog, or YouTube series. You might inspire others.
🏁 Step 11: Showcasing Your Restored Car
Now it’s time to show off your car. Enter car shows, join clubs, or just enjoy a drive. Sharing your passion builds a community.
Seeing people’s reactions is the best feeling.
🔄 Step 12: Regular Maintenance
Restoring a car is not just a one-time thing. You need to keep it up. Change the oil, check belts and hoses, and watch the brakes and tires.
Store it in a cool, dry place when not in use. A well-kept classic car stays valuable and brings joy for years.
📊 Restoration Cost Breakdown
| Component | Estimated Cost |
|---|---|
| Engine Rebuild | $2,500 – $4,000 |
| Transmission Repair | $1,500 – $3,000 |
| Bodywork & Paint | $3,000 – $10,000 |
| Interior Restoration | $1,000 – $5,000 |
| Electrical System | $500 – $2,000 |
| Misc. Parts & Labor | $1,000 – $3,000 |
| Total Estimate | $9,500 – $27,000 |
🧠 Final Thoughts
Restoring a vintage car is a big project. It’s a labor of love and a dive into history. Every step brings you closer to something special.
When it’s done, the feeling of pride is unmatched. Are you ready to start your journey?
❓ FAQs
Q1: How long does a full restoration take?
A full restoration can take 6 months to 2+ years. It depends on the car’s condition and how much time you work on it each week.
Q2: Is it more affordable to restore a car yourself?
DIY restoration is cheaper for labor. But, costs can add up fast. Always budget wisely and focus on safety and quality.
Q3: Can beginners take on a full restoration?
Yes, many beginners have successfully restored cars. Just be ready to learn, ask for help, and take your time.
Q4: How do I find rare or discontinued parts?
Look online at classic car forums, salvage yards, eBay, and vintage car part stores. Also, don’t forget to ask car clubs or restoration communities for help.
Q5: What’s the best classic car for beginners to restore?
Ford Mustang, Chevy Camaro, or VW Beetle are great for beginners. They have good parts support and strong communities.